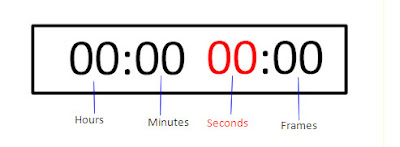
First you should always allocate the scratch discs that you are saving your work in order to be able to have your work safe!
When you open first the program make sure is your work open because usually it opens the last project. File - close project / File - new project
Setting scratch discs - so all the folders will go and saved in one place -
File - Log and Capture
Capture settings - scratch discs
1st SET - find the scratch disc you wish to save your work on - choose
do the same act for Waveform cache
Thumbnail cache
Auto save cache
Inserting the tape in the console - carefully without pushing it inside by force.

Logging - change the description name every time you change subject and the reel every time you insert a different cassette
Your work area includes - the Browser / Viewer /Canvas /Timeline
If needed rearrangement - window -arrange - standard - in order to arrange your windows in a standard layout to work better.
2 ways of digitization
1. For single shots
To capture - press space bar to play the cassette - with (I) and (O) letters you can Mark In and Mark Out the piece of the cassette that you want to digitize.
When you press (I) a mark appears on the deck control as mark then press (O) to mark out your capture. Play in and out to select you markings in exact seconds you desire.
To clear markings press control +click once and select from the drop menu clear in and out.
After you capture your scene have ready the mouse over "now" when click you are capturing the clip. "esc" to stop the capturing processes
2.For many shots
To capture - press space bar to play the cassette - with (I) and (O) letters you can Mark In and Mark Out the piece of the cassette that you want to digitize as mentioned before. After you mark your capture click log clip.This will appear on your browser menu as offline. Repeat this step as long as you need for your captures.
Batch - all offline items in logging bin
SAVE all your projects !!!!!
To make a new bin(folder) in the browser ctrl+click - new bin
At the timeline blue indicates video and green the audio
Click n hold to select and move the clip on the timeline and snap to the end. Space bar to play the clip. Black screen means that there is nothing on the timeline. Canvas replicates what is on the timeline.
Magnify - bottom line so it will fit all your clips when you have many.
When you click on the edge of the clip it edits the clip by making it shorter - to move it click on the middle of the clip.
When dragging a clip in timeline by drag n drop you actually copy it so you have the original clip on the browser.
 Click on it and drag 2 or more clips at the same direction
Other option is to click and make a square to select and move.
Razor tool - click on it when you move it in the middle of the clip you want to cut.
Edit - undo to go back to the beginning and make sure you select the selection tool again
Effects - 2 clips together to make transition - effects panel - (make sure you are active on timeline) - video transitions - dissolve - cross dissolve
sequence - render all - render both (in order to play what you have edit)
P.S. I apologize for not having prt sc visual of the program but unfortunately i do not own a mac book pro and neither the final cut pro 5 program :( so visit the computer labs for more information:P LOL

No comments:
Post a Comment